miauu’s Script Pack vol.1
12/07/2019
miauu’s Extended Clone Tool
12/07/2019
miauu's Work Plane
BY BUYING THIS PRODUCT YOU AGREE WITH THE FOLLOWING LICENSE AGREEMENT
With your purchase you can get installers for 2(two) versions of 3ds max, and an installer for the next major update of 3ds max.
€10.00
In the next 24-36 hours in your PayPal email you will receive an e-mail with download instructions. Please check your Spam Email folder just in case the License email got delivered there instead of your Inbox. If you haven't received your License information within 24 hours of your purchase, contact me.
SYSTEM REQUIREMENTS: Autodesk® 3ds Max® and 3ds Max Design® 2013, 2014, 2015, 2016, 2017, 2018, 2019, 2020, 2021, 2022, 2023, 2024, 2025
If you are familliar with Work Plane in Autocad, Revit or Modo and you want to have such a tool in 3ds Max "miauu's Work Plane" is what you need.
The miauu's Work Plane is a script for 3ds max which create a work plane that automatically adjusts to match the two major axes most closely aligned to the screen axis. When you rotate the Perspective viewport the miauu's Work Plane will snap to the dominant plane, XY, XZ or YZ.
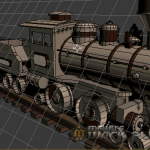
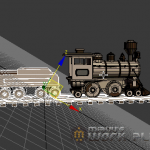
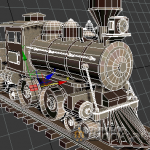
While the default mode for the miauu's Work Plane is to automatically adjust to the screen rotation, the miauu's Work Plane can also be locked and used as a construction plane. There are a number of methods for manually setting the miauu's Work Plane to a specific center and axis. The miauu's Work Plane can very quickly be locked to a specific major axis and position, or you can easily snap the miauu's Work Plane to the selected geometry or even to the polygons directly under the mouse. This level of flexibility and control provides you with an incredibly fluid and rich set of options for editing your workspace.
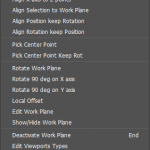
You can also force the miauu's Work Plane into a manual alignment using the miauu's Work Plane commands. These commands are available in the Work Plane menu,located in the main menu bar, but the best solution is to go to Customize - Customize User Interface - miauu's Work Plane category and assign a hotkey to most of the commands.
Download the HELP file to see all features in action.
If the help file is not displayed properly on Windows Vista, 7, 8, 10, please read this article to solve the problem.
Long description.
The miauu's Work Plane can be activated and deactivated. To activate it select "Align Work Plane to selection" from Work Plane menu or press the hotkey that is asigned to this command. Using the hotkey have its advantages - you can align the work plane to any visible polygon in the scene. But let see what the menu commands do:
- Reset Work Plane - put work plane to its default mode - the work plane will automatically adjust to the screen rotation.
- Reset Work Plane to Current Point - Put work plane to its default mode - the work plane will automatically adjust to the screen rotation. The center of the work plane will remain the same place where it was when the Reset Work Plane to Current Point is activated.
- Lock/Unlock Work Plane(Idea by Shawn Olson) - The Lock/Unlock Work Plane works as a toggle. When the work plane is in its default mode - the work plane automatically adjust to the screen rotation, pressing the Lock/Unlock Work Plane will lock the work plane and the automatic adjustment will stop. To unlock the work plane(the automatic adjustment will start) press again Lock/Unlock Work Plane.
- Align Work Plane to Selection - activate the work plane and align it to current selection. See below for better explanation.
- Auto Align Work Plane to Selection(Idea by Benko Csaba) - when is ON the Work Plane will be aligned to each object that you select. When you create new object and the AutoGrid is turned ON the Work Plane will be aligned to the created object.
- Pick 3 points to align Work Plane - select three points in the scene and the XY plane of the Work Plane will be aligned to these points.
- Align Selection to Work Plane - Align selected objects to work plane or make them parallel to work plane(the objects will stay in place). In sub-object mode will project the selected verts, edges or polygons to work plane. This is the same as Make Planar, but will make the selected verts.edges or polygons planar to the work plane.
- Pick Center Point - Sets the center of miauu's Work Plane. Works the same way as the Pick Center Point button in Edit Work Plane rollout.
- Align Position keep Rotation - Aligns the position(center point) of miauu's Work Plane to selected sub-object(or to the center of the face under the mouse cursor when a hotkey is used, position of the selected object), but keeps the rotation of miauu's Work Plane unchanged.
- Align Rotation keep Position - Aligns the rotation of miauu's Work Plane to selected sub-object(or to the center of the face under the mouse cursor when a hotkey is used, position of the selected object), but keeps the position of the miauu's Work Plane unchanged.
- Align Viewport to Work Plane now is in main menu(previously was available only via hotkey).
- Auto align Work Plane to viewport - The Z axis of the work plane will point to the center of the viewport.
- Rotate Work Plane - pop up a rollout which will allow you to ratate the work plane.
- Local Offset - pop up a rollout which will allow you offset the work plane.
- Edit Work Plane - pop up a rollout which will allow you to: set the center of the work plane in world coordinate system; snap the work plane to XY, XZ or YZ plane; rotate work plane by 90 degrees around the X or Y axis; set the length and the width of the work plane; set the work plane grid spacing; freeze or unfreeze the work plane.
- Deactivete Work Plane - will turn off the miauu's Work Plane.
- Edit Viewports Type -allow you to change the view type of all viewports.When the "Auto VP types" checkbox is ON every time when you set new position of miauu's Work Plane, the other viewports will show the correct view type (top, bottom, left, right, front, back). Use the "Top", "Bottom", "Left", "Right", "Front" and "Back" buttons to manualy set the view type for the current viewport. Press the "Reset all viewports" buttons to reset all viewports in Max to the default layout.
- Save/Load Work Plane - pop up a rollout which will allow you to save as many as you wish positions of the Work Plane. First enter the name for the current Work Plane position and then hit Enter on your keyboard or press the "Save" button. To load new Work Plane position double click on desired name. The saved positions of the Work Plane will be saved with your scene and next time when you load it tha Work Plane positions will be there.
- Axis Rotate - Axis Rotate is a tool to rotate geometry(objects or sub-object selection) around a given point in space. The point of rotation is set to the mouse click position intersecting the Work Plane. You can change the position of rotation point by changing the values of the "Pos X" and "Pos Y" spinner in the UI. The "Pos Z" spinner shows only the Z position of the point of rotation. The green circle shows the positions, which the object can take when it is rotated. You can use Axis Rotate tool with SNAP turned ON.
- Toggle Axis Constraints On/Off (Idea by Vitay Gazin) - allows you to turn axis constraints ON or to turn it OFF. When the Axis Constraints is turned On, the objects can be moved only in XY plane(it is not possible to move objects in Z axis). You can create buttons in custom toolbar, that will stay pressed if the Axis Constraints is ON. Axis Constraints affect Work Plane only when the work plane is in Reset or Reset to current point modе.
- Keep Work Plane Active On/Off - when is ON, the Reference Coordinate System always is Work Plane's coordinate system. When is OFF - you can use different coordinate system for Select and Move, Select and Rotate, Select and Scale.
- Step Build Geometry(Idea by Yuriy Georgiev) - Step Build Geometry recreates the Step Build tool in PolyDraw panel introduced in 3ds Max 2010.
Unlike the Step Build tool in PolyDraw panel, the Step Build Geometry works with miauu's Work Plane.
With Step Build Geometry you can build and edit a surface vertex by vertex and polygon by polygon. Works at the object level and all sub-object levels. Right-click to exit the tool.
Following are the different functions of the tool, depending on which keyboard keys are pressed:
- Normal: Click to place vertices on the Work Plane grid.
- Shift: Drag over freestanding vertices to fill in the gaps with quad polygons. This always creates a polygon from the closest four vertices.
- Ctrl: Click a polygon to delete it. The vertices remain so that if you accidently create a face in the wrong place it's easy to delete the face and draw again closer to the vertices you want.
- Alt: Click a vertex to remove it.
- Ctrl+Alt: Click an edge to remove it.
- Ctrl+Shift: Click to place and select vertices, or to select existing vertices. Each time you place and/or select four vertices, Step Build automatically creates a polygon. It includes the last two vertices from the previously created polygon in the new selection, so you need only click twice to create the next polygon. To clear the selection, release the keys.
- Shift+Alt: Move the mouse cursor (without dragging) over vertices to select them, and then click to create a polygon from the selected vertices. Useful for creating 3 sided polygons. To clear the selection, release the keys.
- Ctrl+Shift+Alt: Drag to move a vertex around on the Work Plane grid. The vertices that are moved will be placed on the Work Plane. At the Vertex sub-object level, a vertex highlights when you move the mouse near enough to start dragging it.
- Extend Geometry(Idea by Yuriy Georgiev) - Extend Geometry recreates the Extend tool in PolyDraw panel introduced in 3ds Max 2010.
Unlike the Extend tool in PolyDraw panel, the Extend Geometry works with miauu's Work Plane.
With the Extend Geometry you can work on the open edges of the object; those on the border of the surface that have only one polygon attached. Following are the different functions of the Extend Geometry :
- Normal: Drag a border vertex to create a polygon.
- Shift: Drag a border edge to create a polygon.
- Ctrl+Alt: Drag between two edges to create a polygon.
- Ctrl: Click to delete a polygon and its isolated vertices.
- Ctrl+Shift+Alt: Drag a vertex to move it around on the Work Plane grid.
- Draw Freeform spline - allows you to draw spline using the Work Plane as a reference grid. You can use Draw Freeform spline to extend the selected spline.
* Mouse behavior and keyboard shortcuts behave as they do in Autodesk Maya.
How miauu's Work Plane works:
When SNAP is turned ON Align Work Plane to Selection works as follows(Idea by Shawn Olson):
- If Vertex and/or Endpoint snap is On the the miauu's Work Plane will use the highlighted vert normal to define the Z axis of the work plane. Center of miauu's Work Plane will match the highlighted vert position.
- If Edge/Segment, Face and Midpoint snap is On the miauu's Work Plane will use the highlighted position on the scene to set the center of the work plane. The work plane WILL NOT be aligned to the highlighted edge, face or midpoint.
- If Face Center snap is on miauu's Work Plane will be aligned to the highlighted face. The normal of that face will define the Z axis of the coordinate system. Center of miauu's Work Plane will match with the center of the highlighted face. When SNAP is turned OFF Align Work Plane to Selection works as follows
No object(objects) is selected:
- if mouse cursor is not over geometry(object that can be converted to mesh) object miauu's Work Plane will go to its default mode - the work plane will automatically adjust to the screen rotation. Thanks to Bryan Cavett for providing me the code that do the magic.
- if mouse cursor is over any polygon in the geometry object the miauu's Work Plane will uses that polygon as the basis for the Work Plane orientation and will be aligned to it(XRef scenes are supported(Idea by Shawn Olson). There will be some lag on scenes with thousands of objects. )..
Two or more objects are selected:
- the Work Plane will use the center point of the first three objects to define the XY plane
One object is selected:
In vertex sub-object level:
- if 1 vert is selected the miauu's Work Plane will use that vert normal to define the Z axis of the work plane. Center of the work plane will match the vert position.
- if 2 or 3 verts/knots are selected the miauu's Work Plane will use these verts to define the XY plane. Center of the work plane will match the middle point between selected verts.The Y axis will match the direction betwen selected verts.
In edge sub-object level:
- if 1 edge/segment is selected miauu's Work Plane will be aligned to selected edge. The center of the work plane will match the edge center. The Z axis will match the normal of the edge, Y axis will match the direction of the edge.
- if 2 edges/segments are selected miauu's Work Plane will be aligned to selected edges. Center of the work plane will match with the midpoint of the two centers of the edges. The Z axis will match the normal of the plane that selected edges forms, the Y axis will match the direction between the centers of the selected edges.
In polygon/element sub-object mode:
- if 1 polygon is selected miauu's Work Plane will be aligned to the selected polygon. The normal of that polygon will define the Z axis of the work plane. Center of the work plane will match with the center of the selected polygon. The Y axis will matdh the direction of the longest edge of the selected face.
- if 2 or more faces are selected miauu's Work Plane will be aligned to the selected polygons and the center of the work plane will match with the midpoint of the centers of all selected polygons.
In top sub-object level:
- Work Plane will be aligned the same way as the local pivot of the selected object.
Mastering the miauu's Work Plane will allow you the freedom to do most, if not all, of your modeling in a single perspective viewport. That means more screen real estate for viewing your model and essential tools.
The Work Plane is a very useful and powerful modeling assistant. At the most simple case it enables greater control of your modeling tools while working in the perspective view. As you grow to understand and use the miauu's Work Plane more fully it becomes an incredibly fast method for creating construction planes and constraining your tools to specific axes
v. 1.34
+ NEW: Added support for 3ds Max 2025
v. 1.33
+ NEW: Added support for 3ds Max 2024
v. 1.32
+ NEW: Added support for 3ds Max 2023
v. 1.31
+ NEW: Added support for 3ds Max 2022
+ Fixed a bug when the Deactivate Work Plane is executed.
v. 1.30
+ NEW: Added support for 3ds Max 2021
v. 1.29
+ NEW: Added Align X axis to 2 points - The Work Plane is reorient so its X axis to match the direction between the two picked points. The Z axis of the Work Plane will match the world Z axis.
+ NEW: Align WP to the face under mouse cursor - works properly only when it is assigned to a hotkey and because of this it is not included in the Work Plane's menu.
+ NEW: Added support for 3ds Max 2020.
v. 1.28
+ NEW: Added icons, so now you can use the menu and/or you can create a custom toolbar.
v. 1.27
+ NEW: Added support for 3ds Max 2019.
+ NEW: Draw Freeform spline - draw spline using the Work Plane as a reference grid.
+ NEW: Added Hide Work Plane in Edit Work Plane rollout. When it is checked the created Work Plane will be hidden. When it is not checked the Work Plane will be visible at time of its creation.
Shawn Olson
Two thumbs up on this one. Favorite new tool (and I have a lot). What's so cool about this one is that you can use it in all projects... whereas a lot of times you buy a script that is only relevent in certain circumstances. This one is well worth your money!

